How to Build a Splash Pad: Step-by-Step DIY Guide
How to build a splash pad? Discover the 4 simple steps to create your dream splash pad with our expert guide. Get started today and make a splash. When it comes to creating a fantastic outdoor space for your family, few things are as enjoyable and refreshing as a splash pad. These water playgrounds provide endless hours of fun and are perfect for beating the summer heat. Plus, building one yourself can be a highly rewarding project. In this comprehensive guide, we will walk you through the step-by-step process of creating your own DIY splash pad.
What is a Splash Pad?
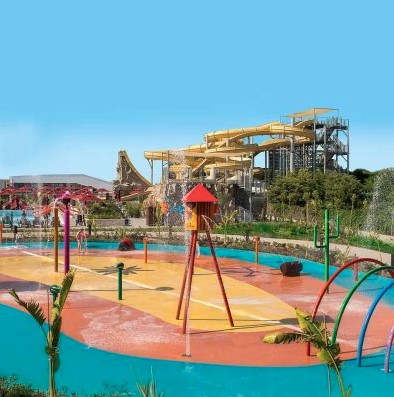
Before we dive into the nitty-gritty of building a splash pad, it’s essential to understand what it is and why it’s such a fantastic addition to your outdoor area. A splash pad, often referred to as a spray park, is a recreational area where water is sprayed, jetted, or fountained for recreational play. It’s a safe and fun alternative to a traditional swimming pool, making it an ideal choice for families with young children.
Planning Your Splash Pad
Location, Location, Location
The first step in creating your DIY splash pad is to choose the perfect location. Consider factors like the availability of space, proximity to a water source, and visibility from your home. A location with good visibility allows you to keep an eye on your children while they play, ensuring their safety.
Budgeting
Determine your budget for the project. Splash pads can be as simple or as elaborate as you desire, and your budget will largely dictate the size and features of your splash pad. It’s essential to establish a realistic budget before you start purchasing materials.
Design and Layout
Designing your splash pad is where your creativity can shine. Consider the theme you want, the layout of water features, and any special elements like decorative tiles or vibrant colors. Sketch out your ideas to have a clear vision of what you want to create.
Gathering Materials and Tools
To create an outstanding splash pad, you’ll need the following materials and tools:
Materials
- PVC pipes and fittings
- PVC glue
- Tarp or plastic liner
- Non-slip spray paint
- Decorative tiles (optional)
- Water spray features
- Water pump
- Sand or gravel
Tools
- Shovel
- Measuring tape
- Saw
- Drill
- Level
- Wrench
Constructing Your Splash Pad
Now, let’s get into the practical aspect of building your splash pad.
Excavation and Foundation
- Start by outlining the shape of your splash pad on the ground.
- Excavate the area, ensuring it’s level and free from any sharp objects that could damage the tarp.
- Lay a layer of sand or gravel to provide a stable base.
- Place a tarp or plastic liner over the area, securing it in place.
Plumbing and Water Features
- Install the water pump and connect it to your water source.
- Use PVC pipes and fittings to create the water distribution system.
- Position the water spray features according to your design.
Safety First
- Apply non-slip spray paint to the surface of the splash pad.
- Ensure all connections and fittings are secure and watertight.
- Check the water pump for proper functioning.
Adding the Finishing Touches
Now that your splash pad is taking shape, you can add those final touches to make it truly special.
Decorative Elements
If you’ve opted for decorative tiles or other design elements, now is the time to install them. These can add a unique and personalized touch to your splash pad.
Test Run
Before inviting the family for a splash, perform a thorough test run to ensure everything is working correctly. Check for leaks, water pressure, and the functionality of all water features.
Maintenance
To keep your splash pad in top condition, regular maintenance is crucial. Clean the surface, check for wear and tear, and make any necessary repairs promptly.
Safety and Guidelines
While splash pads are a fantastic way to cool off and have fun, it’s essential to follow some safety guidelines:
- Always supervise children while they play on the splash pad.
- Ensure the water source and pump are secure and safe.
- Teach children about safety rules and boundaries.
- Regularly inspect the splash pad for any potential hazards.
In conclusion, building your DIY splash pad can be a highly rewarding project that adds value and endless entertainment to your outdoor space. By following this step-by-step guide, you can create a splash pad that will provide joy and fun for your family for years to come.


